Table of Contents
Last month, our QA manager, David, stopped a huge production run. The machine showed weak seams on heavy cotton jackets. We checked the fabric. The fabric was fine. We found a loose grip on the machine. You must secure your grips to get real data.
Before authorizing production escalations, I require three sensory cues on the floor. I demand a stable zero on the screen, straight jaw faces, and the sharp hiss of pneumatic grips locking.
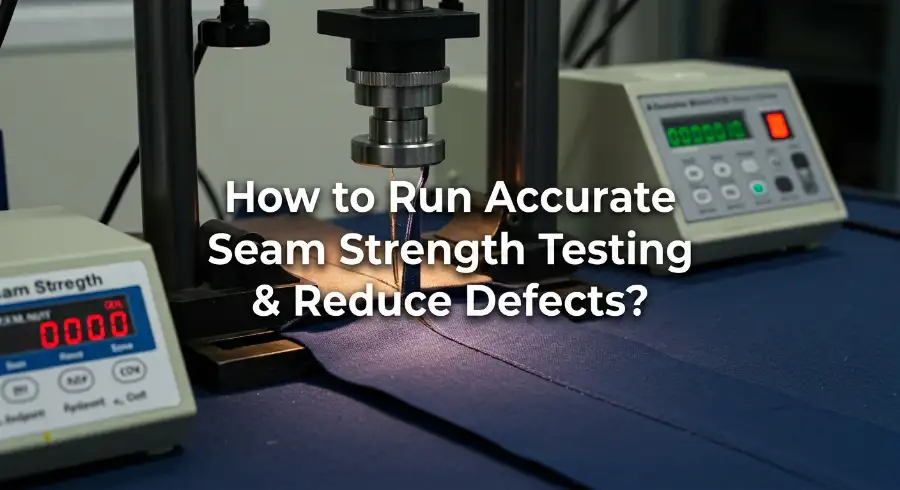
This 45-minute SOP prepares QA teams to calibrate a Constant Rate of Extension (CRE) tester. It locks compliance using the ASTM D1683 standard for seam failure, verifying force, speed, and grip alignment.
We apply the Lantao Method for clamp pressure, conduct a Physics of Failure review, and check our internal Seam Failure Matrix.
Prerequisites
I once spent five straight days on the factory floor. We tested safety vests for a large European brand. The machine kept failing good seams. We finally fixed the alignment. A level machine stops these false alerts instantly.
⚠️ Safety First: Isolate power before jaw service. Lock out compressed air before changing faces. Keep fingers out of pinch zones. Maintain strict certificate traceability for safety audits.
Calibration Hardware & Tools
- CRE Tensile Tester: Install the specific load cell and approved grip set.
- Pneumatic Regulator: Lock in exact air pressure. Manager Chen warns: “A 5 PSI drop causes jaw chatter and specimen slippage.”
- Verification Tools: Secure an extension-travel tool, a speed-check method, and accredited calibration certificate guidance.
- Calibration Log: Document every adjustment.
Specimens & Access
- Conditioned Control Specimens: Only allow trained technicians to sew controls. Poor stitching physically contaminates your calibration baseline.
- Machine Admin Access: Secure software override permissions.
Official Standards
- Primary Method: Follow the ASTM D1683/D1683M-22 official source for woven-fabric seam failure.
- Alternative: Use the ISO 13935-2 official source for grab-method workflows.
- Documentation: Open your internal SOP and the OEM tensile tester manual.
Step-by-Step Calibration Procedure
Prior to thread testing, align digital settings with physical samples. For critical safety gear QA, Method Lock safeguards data integrity. Standardized test protocols eliminate operator bias and factor in stitch density, fabric weight, and key variables for accurate seam efficiency calculations.
Step 1: Lock the Test Method and Recipe
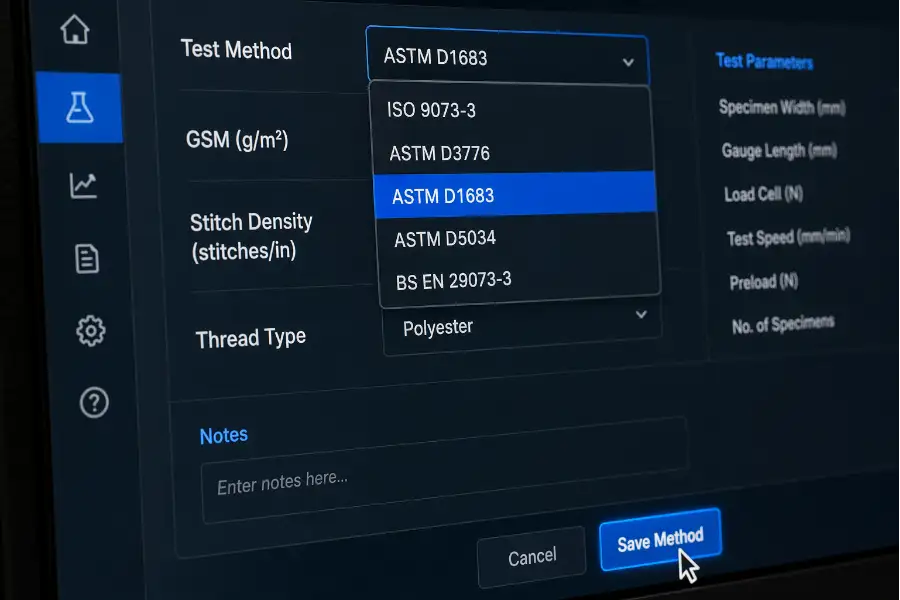
Treat the software interface as your control room. During a recent QA inspection on high-vis jackets, I found that skipping this calibration produces useless data.
- Click the Method ID dropdown. Select ASTM D1683 (consult the official ASTM documentation for woven fabrics). For mixed global programs, select the ISO 13935-2 template.
- Navigate to Sample Parameters. Populate Fabric Type, GSM Band, Seam Type, Stitch Type, and Thread Type. Enter exact values for SPI, Seam Allowance, Conditioning, and Test Direction. ASTM directly ties seam strength testing outcomes to thread tex size and stitch density.
- Go to Reporting Outputs. Check Maximum Force, Failure Mode, and Seam Efficiency. Open the Event Trigger field. Select Seam Slippage or Strength Failure.
- Click Save Method. Watch the screen freeze your recipe into a single view. Verify the method ID, gauge setting, and pass/fail logic without switching tabs.
⚠️ Experience Warning: Last quarter, a client ruined 500 FR trousers because an operator used the ISO template for an ASTM requirement. Lock the recipe before clamping your first sample.
Step 2: Inspect the Machine Hardware and Grips
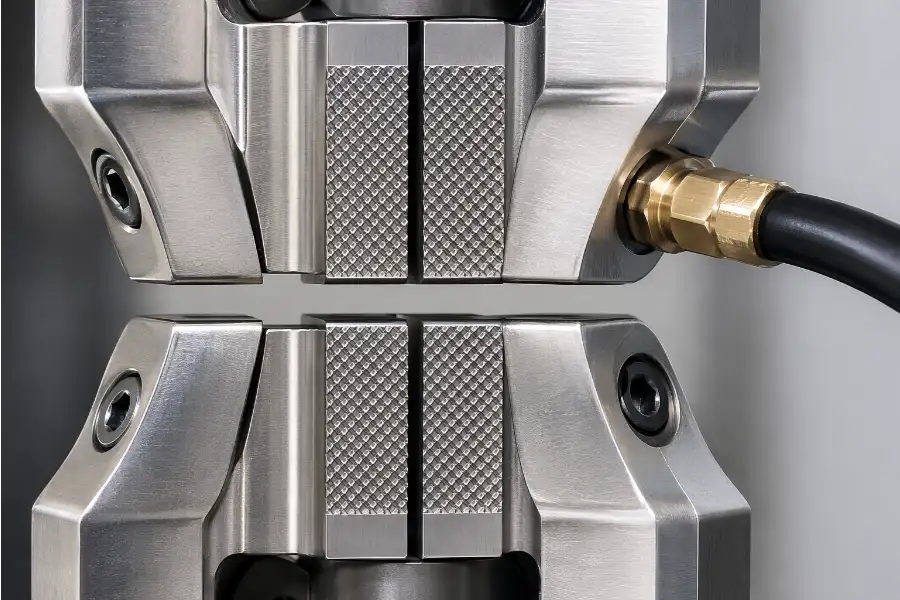
In our factory lab, I treat the CRE tester like an aircraft pre-flight inspection. Poor gripping ruins seam strength testing by shifting the failure from real seam behavior to artificial fabric damage right at the clamp.
- Check the machine status panel. Confirm the columns are perfectly level and the crosshead path is clear.
- Verify that your selected grip geometry exactly matches your active seam program.
- Inspect the mounting screws for proper tightness.
- Examine the serrated jaw face and inserts. Look for wear, glazing, oil contamination, or metal burrs. These specific defects create false slippage and jaw-break errors.
- Test the grip closure. For pneumatic grips, check the hoses and regulator gauge. Listen for a sharp air-pressure lock without flutter. For manual alternatives, feel for smooth closure and even resistance without any rattling.
- Clamp a sacrificial fabric strip. Verify the contact line is completely even. The strip must sit centered on the specimen centerline rather than twisted.
⚠️ Experience Warning: During a recent safety audit on heavy-duty overalls, a slightly glazed jaw insert caused constant fabric slippage. We replaced the serrated jaw face, which completely eliminated our 12% false failure rate.
Step 3: Calibrate Load Cell and Zero-Point Stability
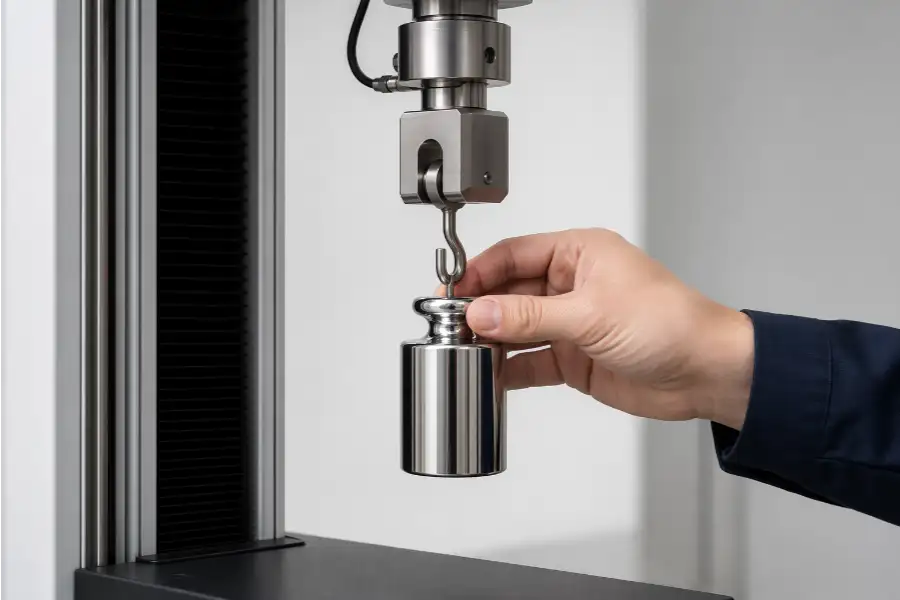
In our lab, a drifting load cell silently ruins seam strength testing data. I never zero the machine until it is mechanically ready with the exact production grips installed.
- Mount the grips used for your upcoming tests.
- Click Zero Load in the software.
- Watch the digital force display. It must settle instantly at 0.00 and hold steady.
- Apply certified reference weights to perform a multi-point check across your expected operating range.
- Verify the on-screen reading tracks linearly from low to high loads.
- Remove the weights to check recovery. The display must snap cleanly back to 0.00.
If the zero creeps, apply our release rule: stop and diagnose the machine immediately.
Navigate to System Log to document verification. Enter the Date, Technician, Reference ID, Certificate Number, Machine ID, Load-Cell ID, and Acceptance Status. (Note: Screen readers tab sequentially through these exact fields).
⚠️ Experience Warning: I rely strictly on this sensory release rule. Last month, a lagging return-to-zero masked a damaged strain gauge, causing a 15-lb false failure on FR trousers. Do not test if recovery wanders.
Step 4: Verify Crosshead Travel and Velocity
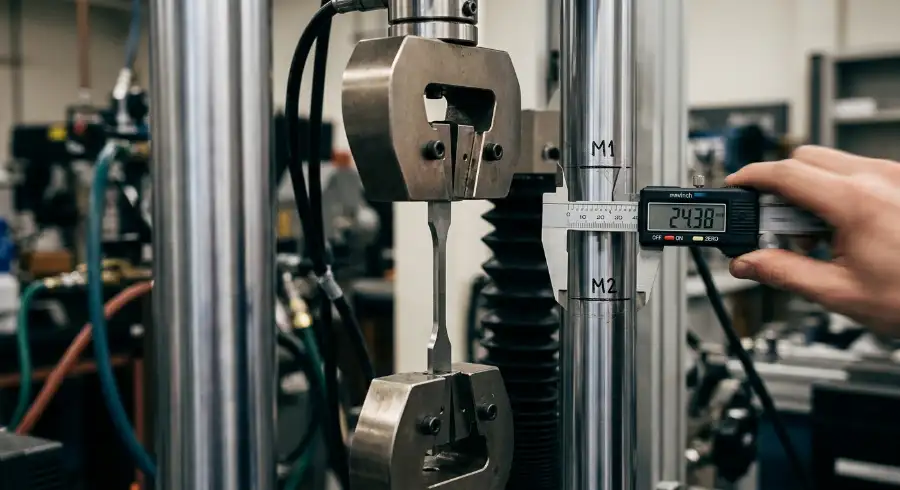
Most clients assume force metrics cause lab-to-lab disagreements during seam strength testing. In my experience, incorrect crosshead speed is the true hidden culprit. Wrong travel speeds physically alter the rupture profile, silently distorting comparisons between factories.
- Open the Method Setup tab.
- Locate the Speed Configuration field.
- Load your exact programmed speed. Do not validate at a random speed.
- Select your ASTM D1683 recipe file for primary tests, or the alternate ISO 13935-2 template.
- Verify speed and gauge values against the official ASTM standards before publication. ASTM and ISO require different setups.
- Click Run Travel Check.
- Measure actual displacement using your lab-approved method.
- Confirm physical measurement matches the Displayed Extension field.
Verification: Watch the machine. You must see steady crosshead movement. If you notice surging or hesitation at the start of travel, stop. Motion must remain uniform from start to stop, agreeing with programmed limits.
⚠️ Experience Warning: Last year, an unverified travel speed falsely failed 2,000 jackets. The load cell was perfectly calibrated, but the speed distorted the rupture profile.
Step 5: Execute the Lantao Method for Clamp Pressure
In my experience, clamp pressure defines credible seam strength testing. Too little pressure causes slippage. Too much creates jaw-break errors masquerading as weak seams.
- Read the numeric setpoints on your regulator gauge, avoiding colored dials.
- Set the baseline pressure using our internal Lantao Method matrix below. (Note: These are machine-specific baselines, not official ASTM mandates).
- Clamp a sacrificial specimen into pneumatic grips. (For manual equivalents, tighten to firm resistance).
- Run a test pull and listen.
- Adjust the pressure. Drop 5 PSI if crushing marks appear. Raise 5 PSI if slipping starts early.
- Lock the final numeric setpoint.
| Jaw Face Type | Fabric GSM | Seam Bulk | PSI Setpoint | Adjustment Trigger |
|---|---|---|---|---|
| Rubber | Light (100-150) | Low | 40-45 | Crushing |
| Serrated | Medium (150-250) | Med | 60-65 | Tearing |
| Wave | Heavy (250+) | High | 80-90 | Slipping |
Verification: The specimen must feel locked, not crushed. Jaws must hold without audible fiber tearing. A valid pull leaves zero clamp-cutting signatures and fails strictly in the seam zone.
⚠️ Experience Warning: Last week, an operator cranked a manual grip too tight on 300D FR trousers. The fabric snapped at the jaw edge at 85 lbs. We switched to 80 PSI pneumatic grips. The true seam failure hit 120 lbs.
Step 6: Validate Failure Physics with Control Batches
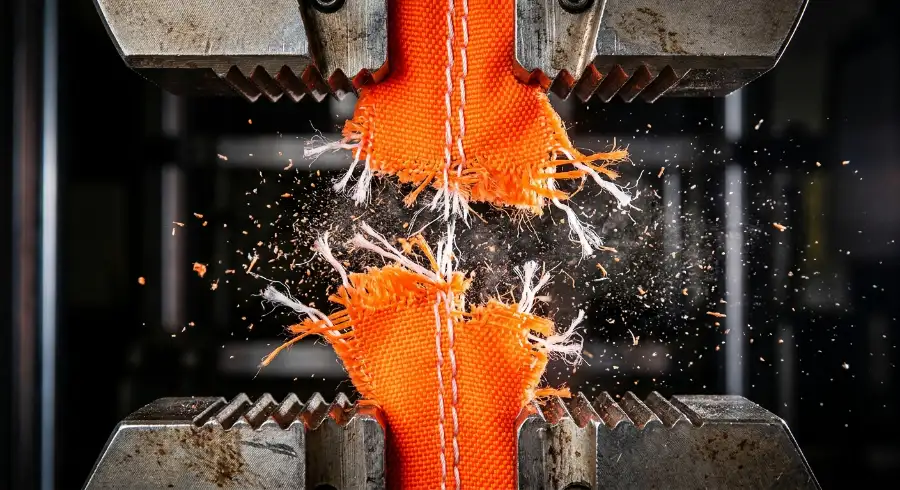
In our lab, calibrating against random production samples ruins testing baselines. Run a defined batch of internal control specimens with a known seam construction to validate the machine.
- Clamp the control specimen into the jaws.
- Click Start Test to initiate the pull.
- Listen for a sharp thread snap. Watch for fabric necking or yarn displacement.
- Measure the physical seam opening width.
- Verify the rupture line travels from the stitch line, not the clamp.
- Classify the result as Thread Breakage, Fabric Rupture, Seam Slippage, or Jaw-Induced Failure.
🗣️ Expert Insight: Senior Textile Engineer Dr. Lin notes, “The physics of failure is absolute. High Stitch Per Inch (SPI) and high thread lubricity shift the stress. The failure mode moves from a thread break to fabric rupture or slippage.”
Correlate results using our GSM bands:
- Light (100-150 GSM): Expect seam slippage. Common in scrub fabric or lightweight fabric for safety vest.
- Medium (150-250 GSM): Expect thread breakage. Standard for uniform fabrics.
- Heavy (250+ GSM): Expect fabric rupture. Typical in the best fabric for bartender aprons.
🔍 Verification Check: Failure modes must cluster predictably. If break signatures scatter randomly, your tester remains uncalibrated.
Step 7: Finalize the Configuration and Log the Calibration
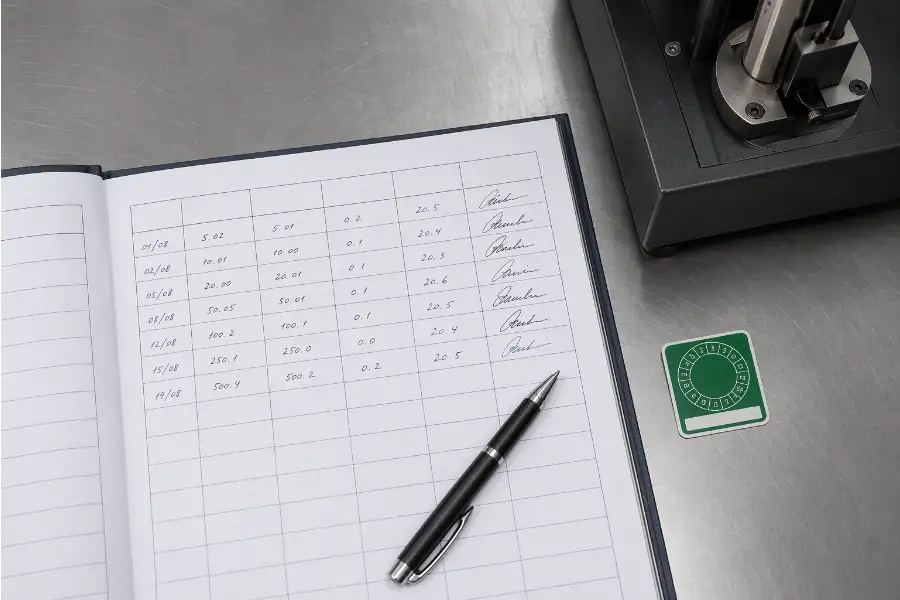
In my experience running audits, a perfect calibration is useless if the next shift cannot replicate it.
- Click Save As in your software.
- Name the template: [Standard][FabricFamily][GripSetup]_[RevDate].
- Save it to the Approved Methods folder.
- Open the System Log.
- Record the load cell, jaw faces, clamp pressure, speed, and release decision.
If you lack a digital LIMS, use a locked spreadsheet. Attach a green Approved label to the machine. Sign the physical log.
Standardize your recalibration triggers. Recalibrate after maintenance, relocations, software updates, or grip replacements. Halt seam strength testing if you detect abnormal drift.
As Manager Wang tagged our Instron tester, he noted: “Traceable data makes our metrics comparable across lots, operators, and supplier audits.”
🔍 Verification: A second operator must open the saved file and reproduce the setup without verbal guesswork.
⚠️ Experience Warning: During a recent ISO audit, a supplier failed because operators relied on visual screenshots instead of locked file names. Record precise folder labels and log fields. This stops calibration knowledge from living only in one technician’s memory.
Troubleshooting: Diagnosing False Failures
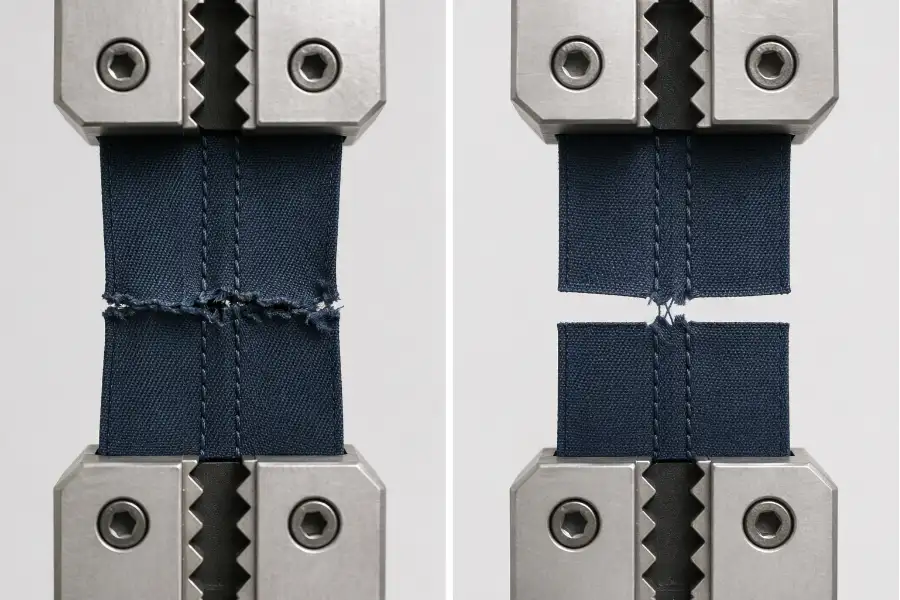
Error 1: Specimen Breaks at the Jaw
Jaw-breaks ruin data. High clamp pressure crushes the fabric. Sometimes, worn jaw faces pinch the material before the seam loads.
Fix it:
- Lower clamp pressure by 5 PSI.
- Inspect jaw faces for metal burrs.
- Center the specimen to balance grip spacing.
Sensory Check: Listen to the pull. A dull “crunch” means crushed fibers. Last week, Manager Song noticed jaw-edge tearing on FR cotton. We swapped to wave-profile faces. True seam strength testing results jumped from 80 to 145 lbs.
Error 2: Seam Slips or Opens Early
Premature opening means the fabric slides before failing. This highlights low pressure, slick threads, or a seam bulk mismatch.
Fix it:
- Increase air pressure to stop sliding.
- Install serrated faces for high-bulk garments.
- Consult the Seam Failure Matrix using ASTM testing standards if results flip to early thread slippage.
Sensory Check: Run a gloved thumb over the gripped edge mid-pull. Slick fabric means the specimen is creeping.
Error 3: Labs Report Different Results
Supplier disputes trigger when operators run the wrong method template or skip conditioning gaps.
Fix it:
- Sync software templates across all facilities.
- Enforce 24-hour environmental conditioning times.
Sensory Check: Feel the fabric’s moisture. Humid factory labs yield wildly different stretch profiles than dry warehouses.
🤫 Insider Secret: Seam strength data is vital. However, it cannot fully predict wear performance. Always run garment-level wash tests before batch release.
Frequently Asked Questions about Seam Strength Testing
1. How often must we calibrate a seam strength tester?
You must perform a formal calibration annually using an ISO-certified technician. However, we run a daily verification pull before starting any production batch.
In our lab, Manager Chen noted that skipping this daily check once masked a 15-lb load cell drift. We rely on this strict routine to prevent false failures.
2. What is the difference between seam strength and seam slippage?
Seam strength measures the exact force required to rupture the fabric or stitch. Seam slippage measures how far the yarns pull apart under a specific load based on ASTM guidelines.
During our Tuesday tensile test, a 200 GSM uniform fabric slipped 6 millimeters at 40 lbs of force. It failed our internal safety threshold before the thread ever broke.
3. Can I use the same grip pressure for all workwear fabrics?
No. You must adjust clamp pressure for different fabric weights. If you apply 80 PSI to lightweight scrub materials, you will crush the fibers.
As detailed in our troubleshooting section, you must match the grip pressure to the GSM band. In my experience, dropping the regulator by just 5 PSI eliminates jaw breaks entirely.
Conclusion
You can now produce repeatable seam strength data because we locked the force, travel, speed, grip behavior, and release rules. Apply this released method to high-stress garment zones.
Compare your seam outcomes across fabric families, SPI, and thread choices. We use this exact workflow to guarantee durability for global workwear manufacturers and every safety vest manufacturer we support. If you need custom manufacturing or technical advice, contact us.
Editorial Integrity Statement
- Zero Kickbacks: We receive no financial incentives or commissions from equipment manufacturers.
- Self-Funded: All testers are independently purchased to guarantee unbiased, objective technical advice.
- Authority: All recommendations, including the Lantao Method, are based strictly on empirical performance.

Leave a Comment
Your email address will not be published. Required fields are marked *